To update an existing cluster type:
-
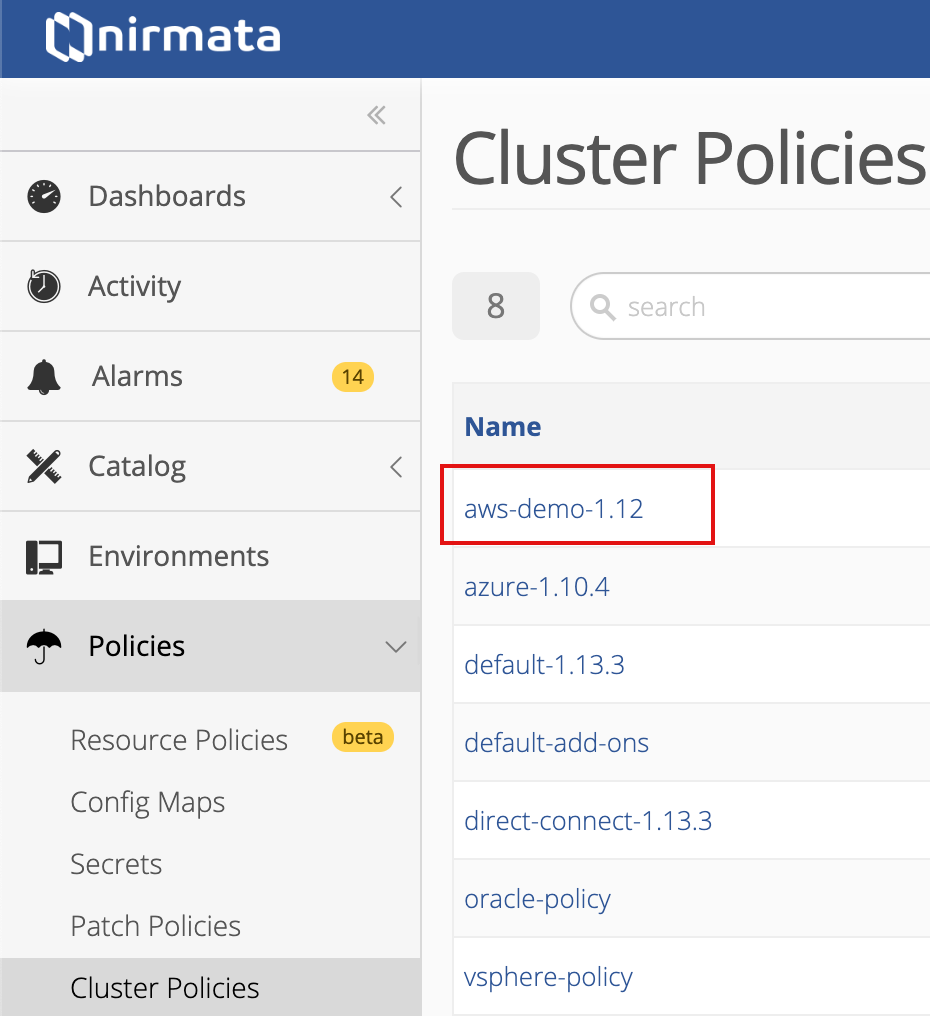
Select Cluster Types from the Policies menu.
-
Find and click the name of the type you wish to edit in the Cluster Types list.
After configuring the type, you can use it when deploying a Kubernetes cluster.
Cluster Type Details Page
Configure the cluster type from the Details page.
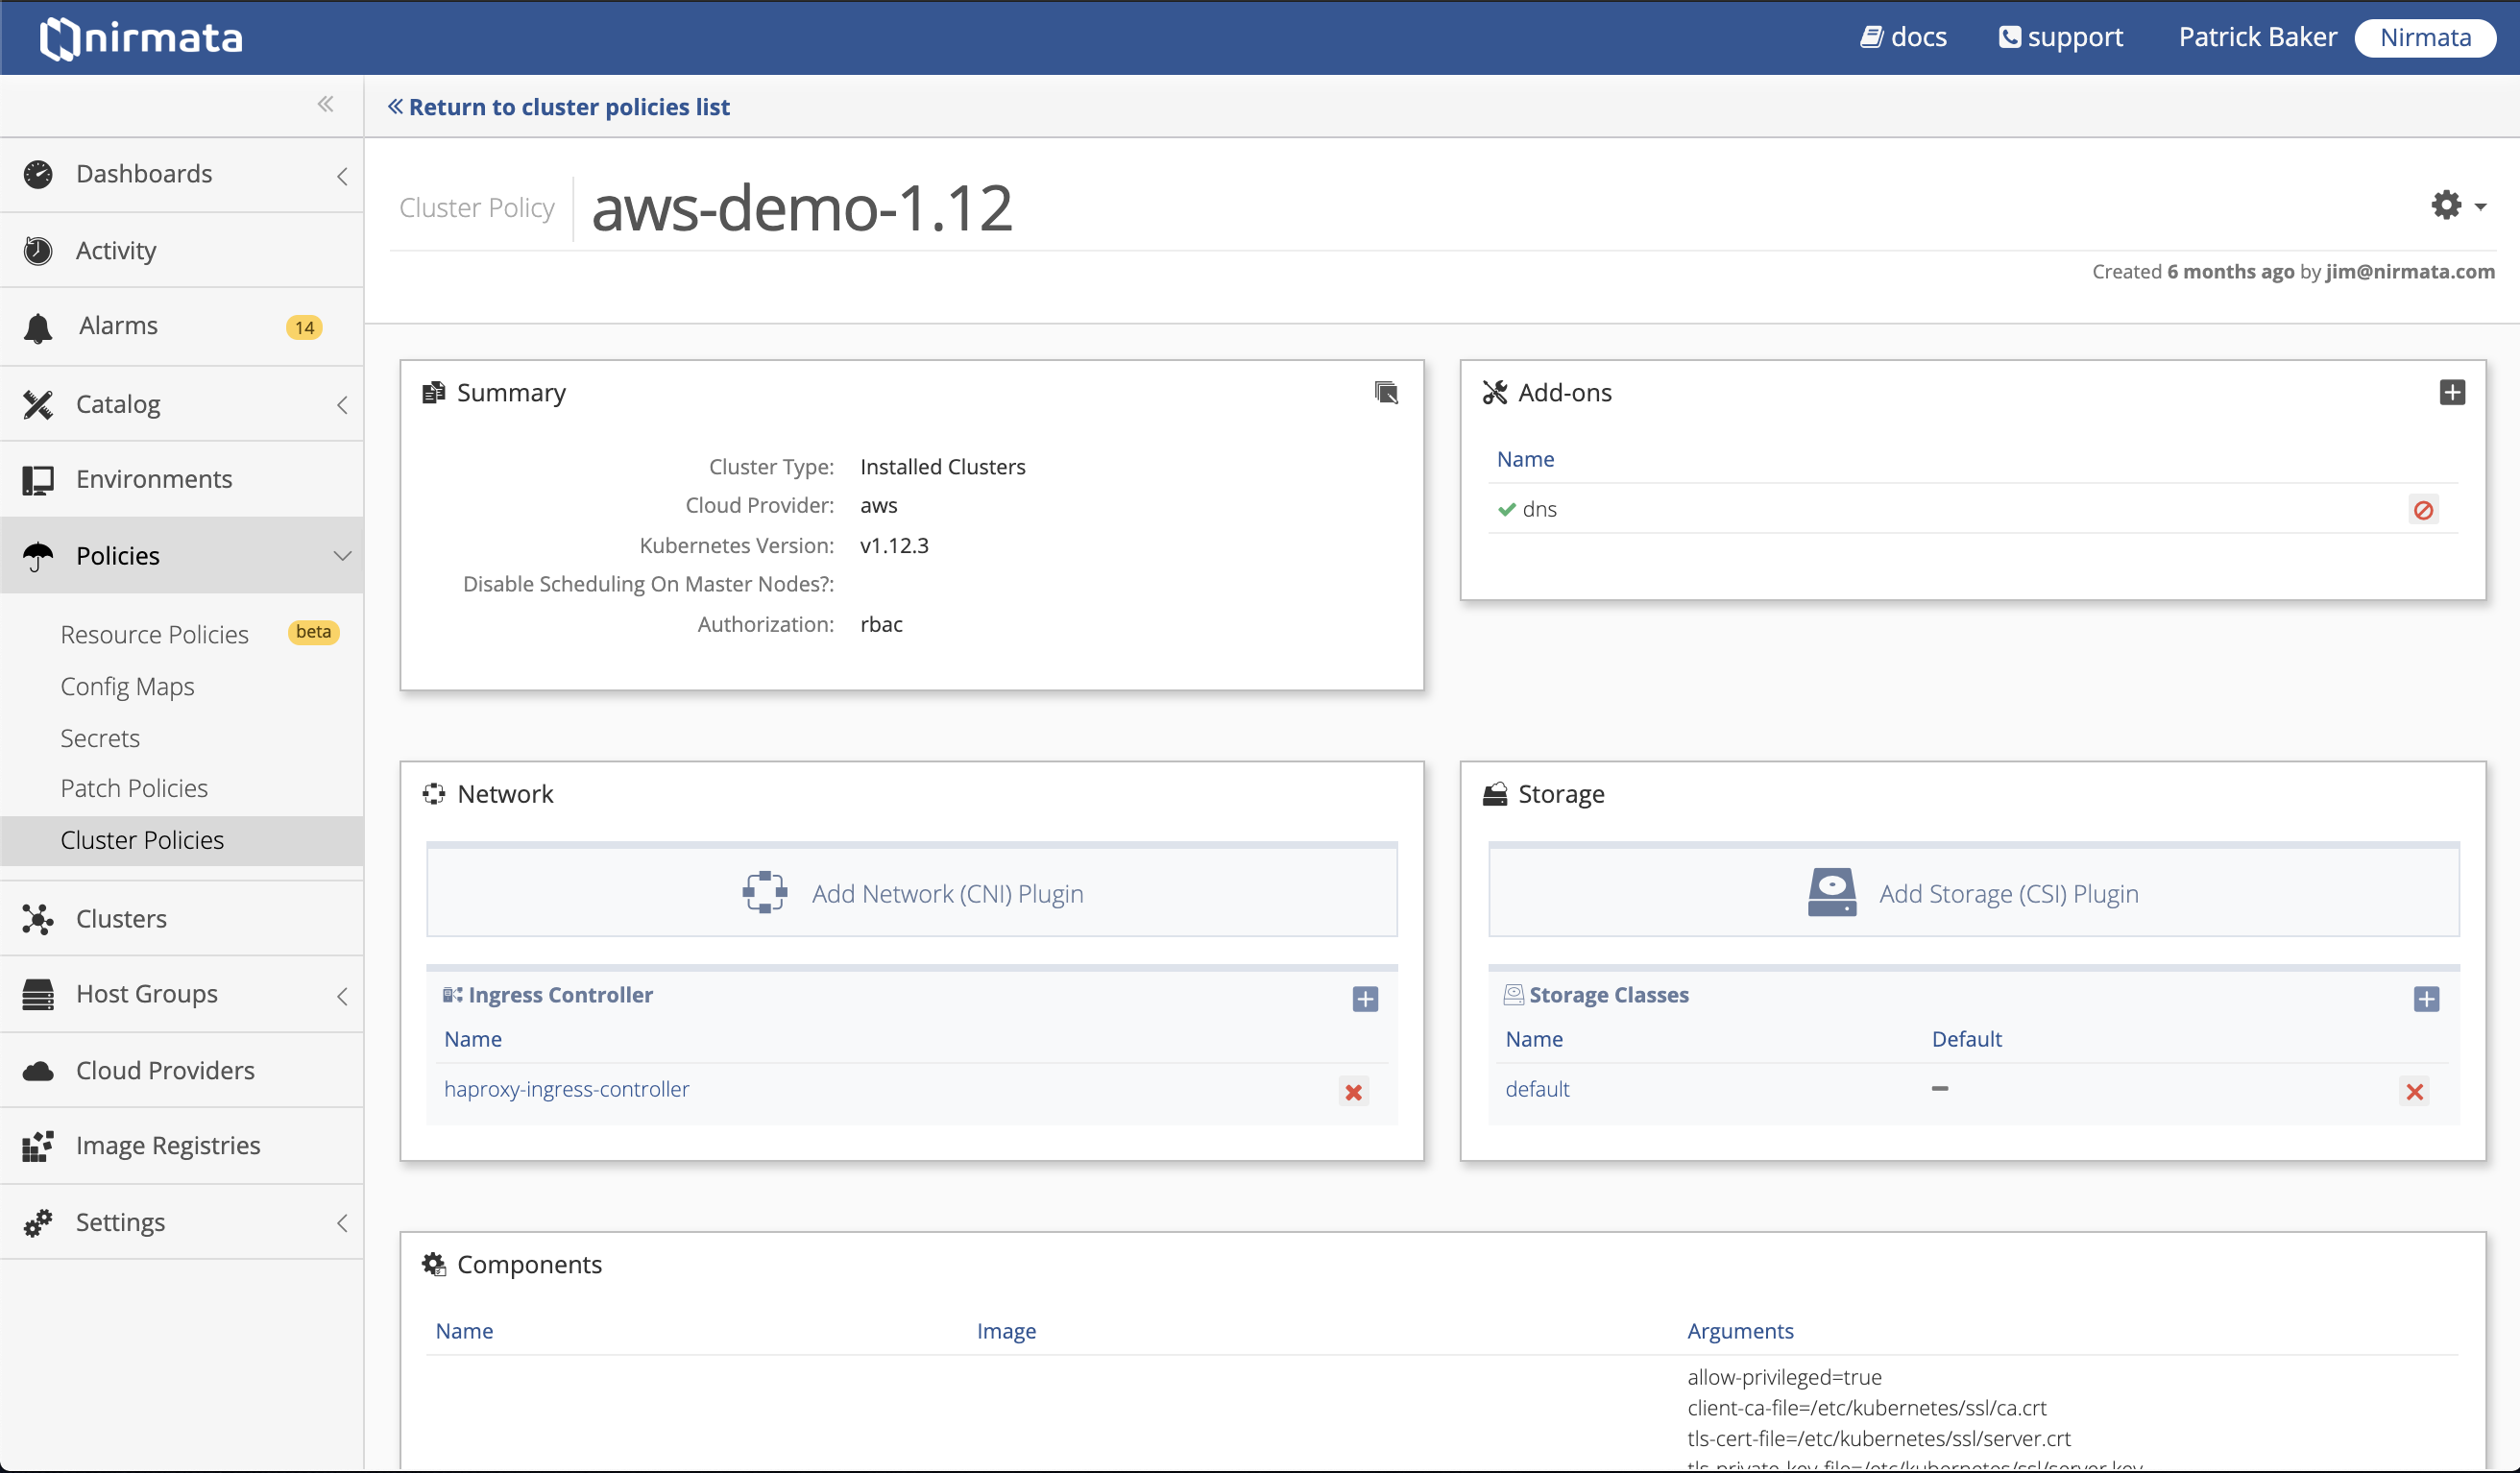
The Cluster Type Details page contains the following sections:
- Summary
- Add-ons
- Components
- Controller Settings
- Ingress Controller
- Network Plugins
- Proxy Settings
- Storage
Summary
The Summary section enables users to change the Version, Cloud Provider, and Master Node Scheduling Flag for a cluster type.
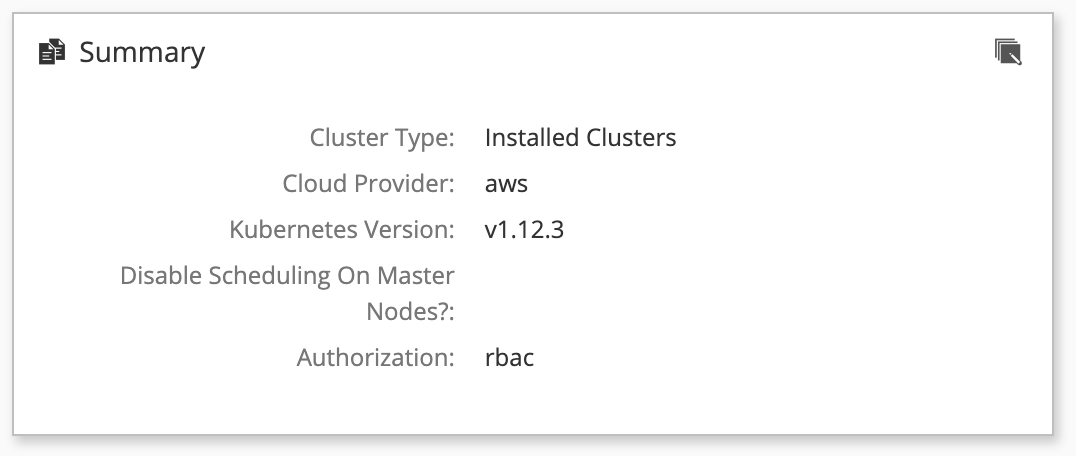
Edit the Summary settings by clicking the Edit icon in the upper right corner of the Summary section.
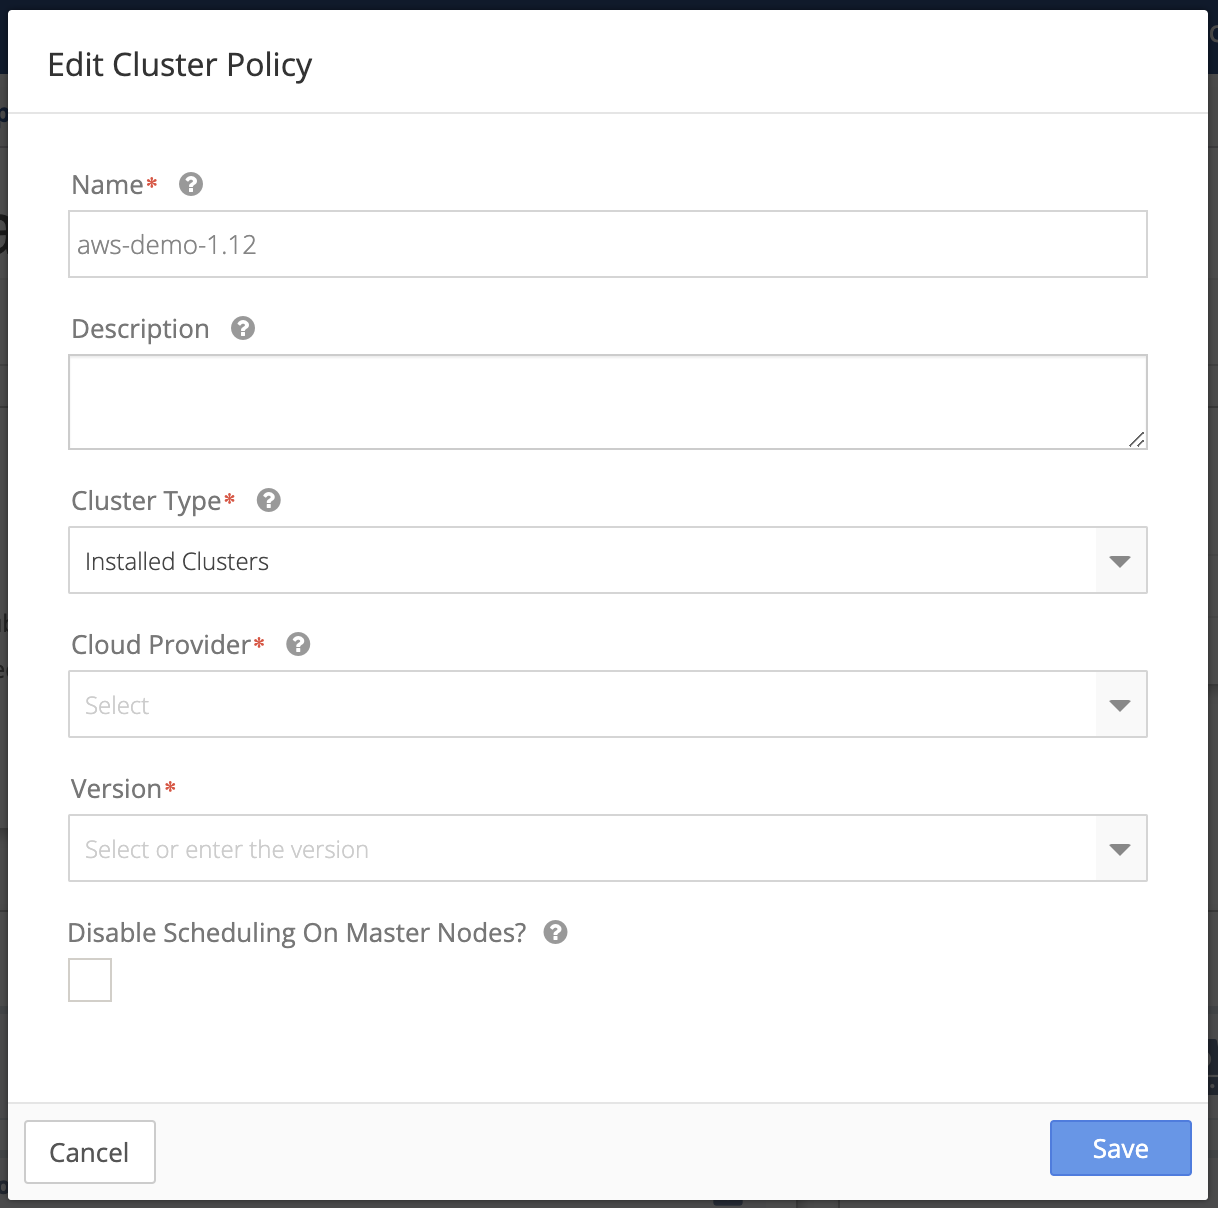
From the Edit Type Details overlay, users can:
- Change the type Name.
- Enter a type Description.
- Choose a different service Version from the drop-down list.
- Choose a different cloud provider from the drop-down list.
- Check the box for the Disable Schedule On Master Nodes setting. Checking the box enables this setting.
- Click the Save button to save your changes or click the Cancel button to return to the Type Details page.
Note: users should check the Disable Schedule On Master Nodes box to enable this setting for their cluster types. Users should turn on Disable Schedule to avoid having the control-plane and applications running on the same nodes.
Add-ons
The Add-ons section lists all Cluster Add-ons selected when creating the cluster type.

The DNS add-on is a default add-on for new cluster types. You can choose a different add-on if you like.
Some available add-ons include:
- Prometheus monitoring
- Vault authentication agent
- Velero backup and restore
Adding More Add-ons
To add more add-ons to a cluster type:
-
Click the + in the upper right corner of the Add-ons section.

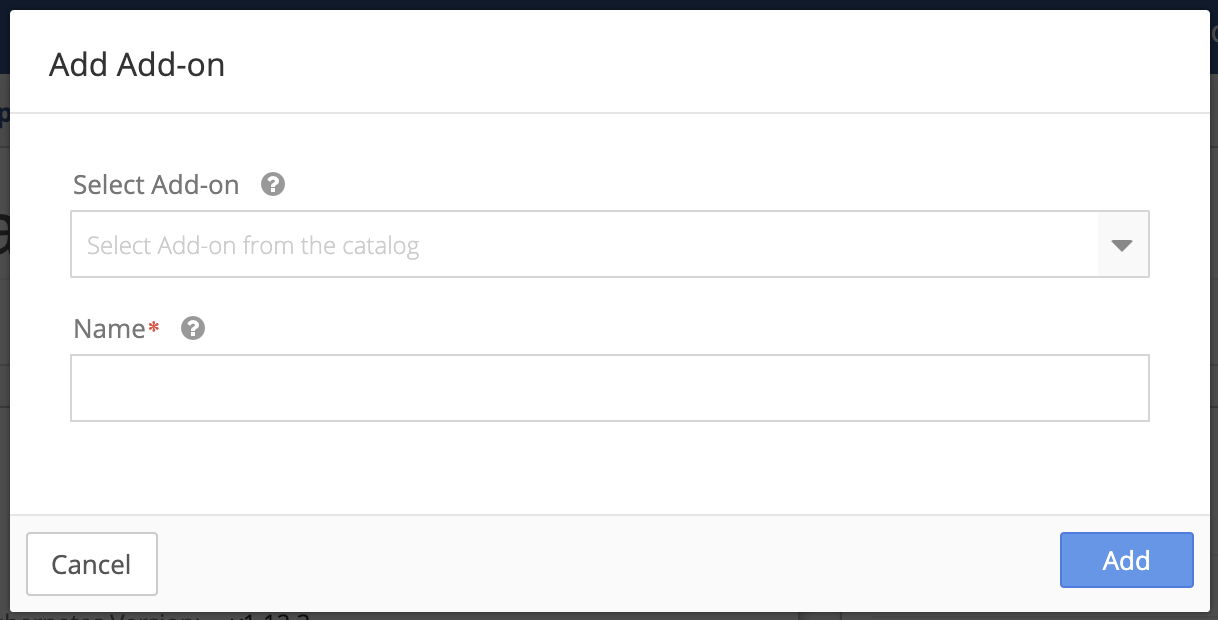
The Add Add-on overlay appears.
-
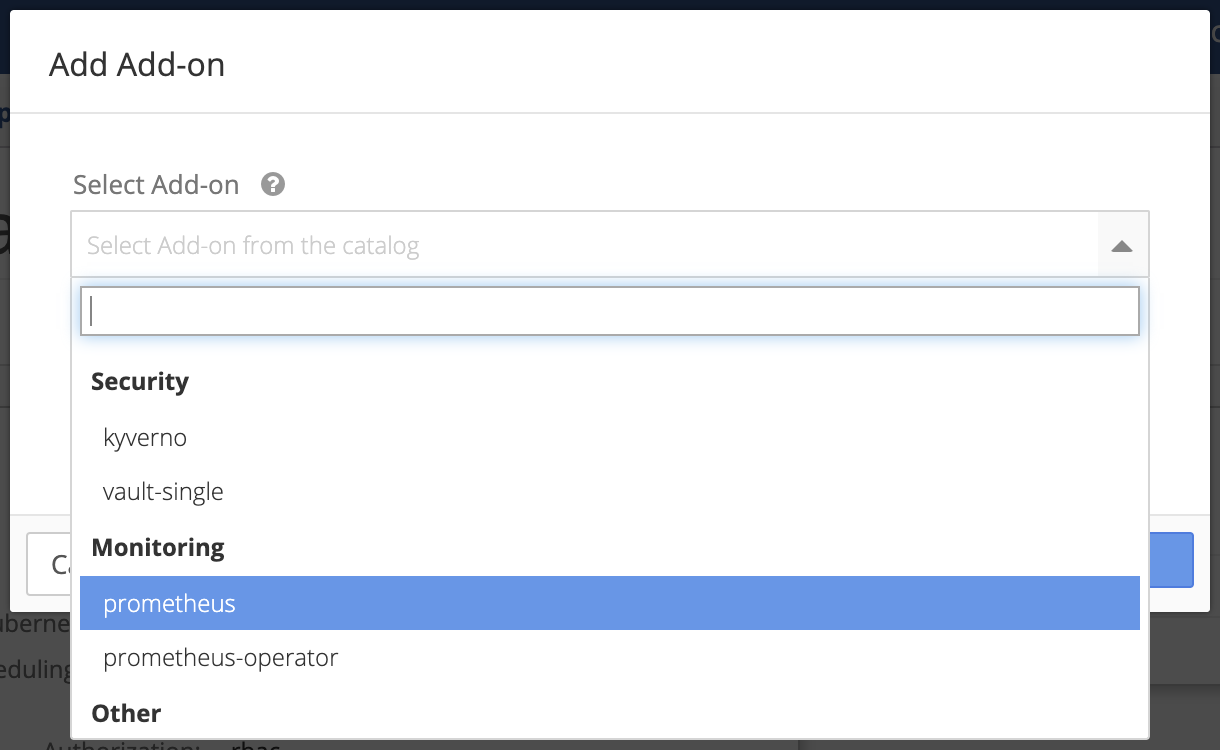
Choose an add-on from the Select Add-on drop-down list. Available options are Prometheus monitoring and the Vault authentication agent.
-
Enter a Name to identify the add-on instance. The default is the name of the selected add-on.
-
Click the Add button add the add-on instance or click Cancel to return to the Police Details page.
Removing Add-ons
To remove add-ons:
-
Click the red X to the right of the add-on name.

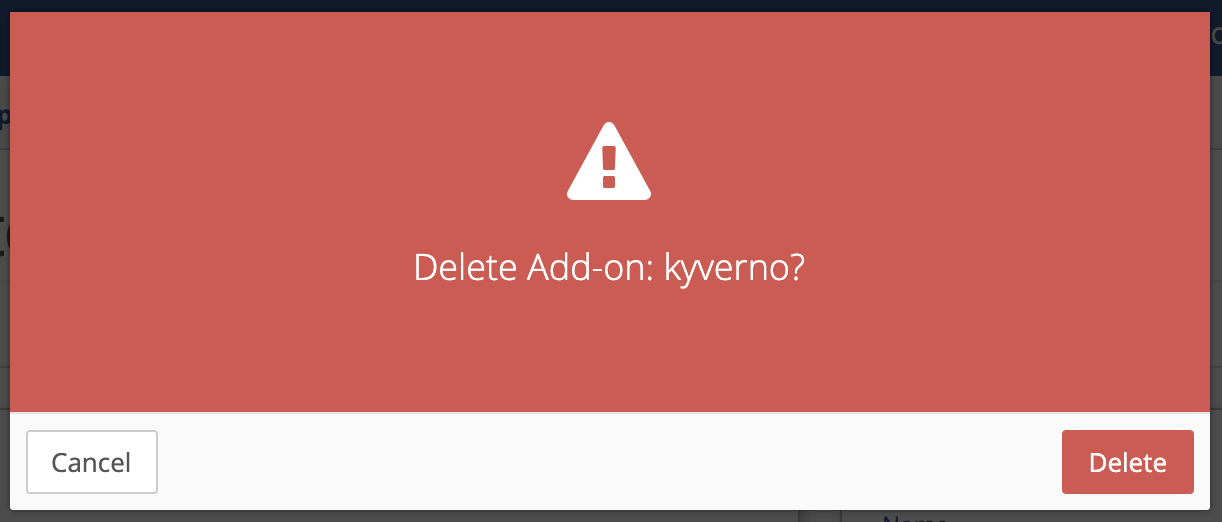
A confirmation overlay appears.
-
Click the Delete button to delete the add-on from the cluster type. Click the Cancel button to return to the Cluster Type Details page.
Components
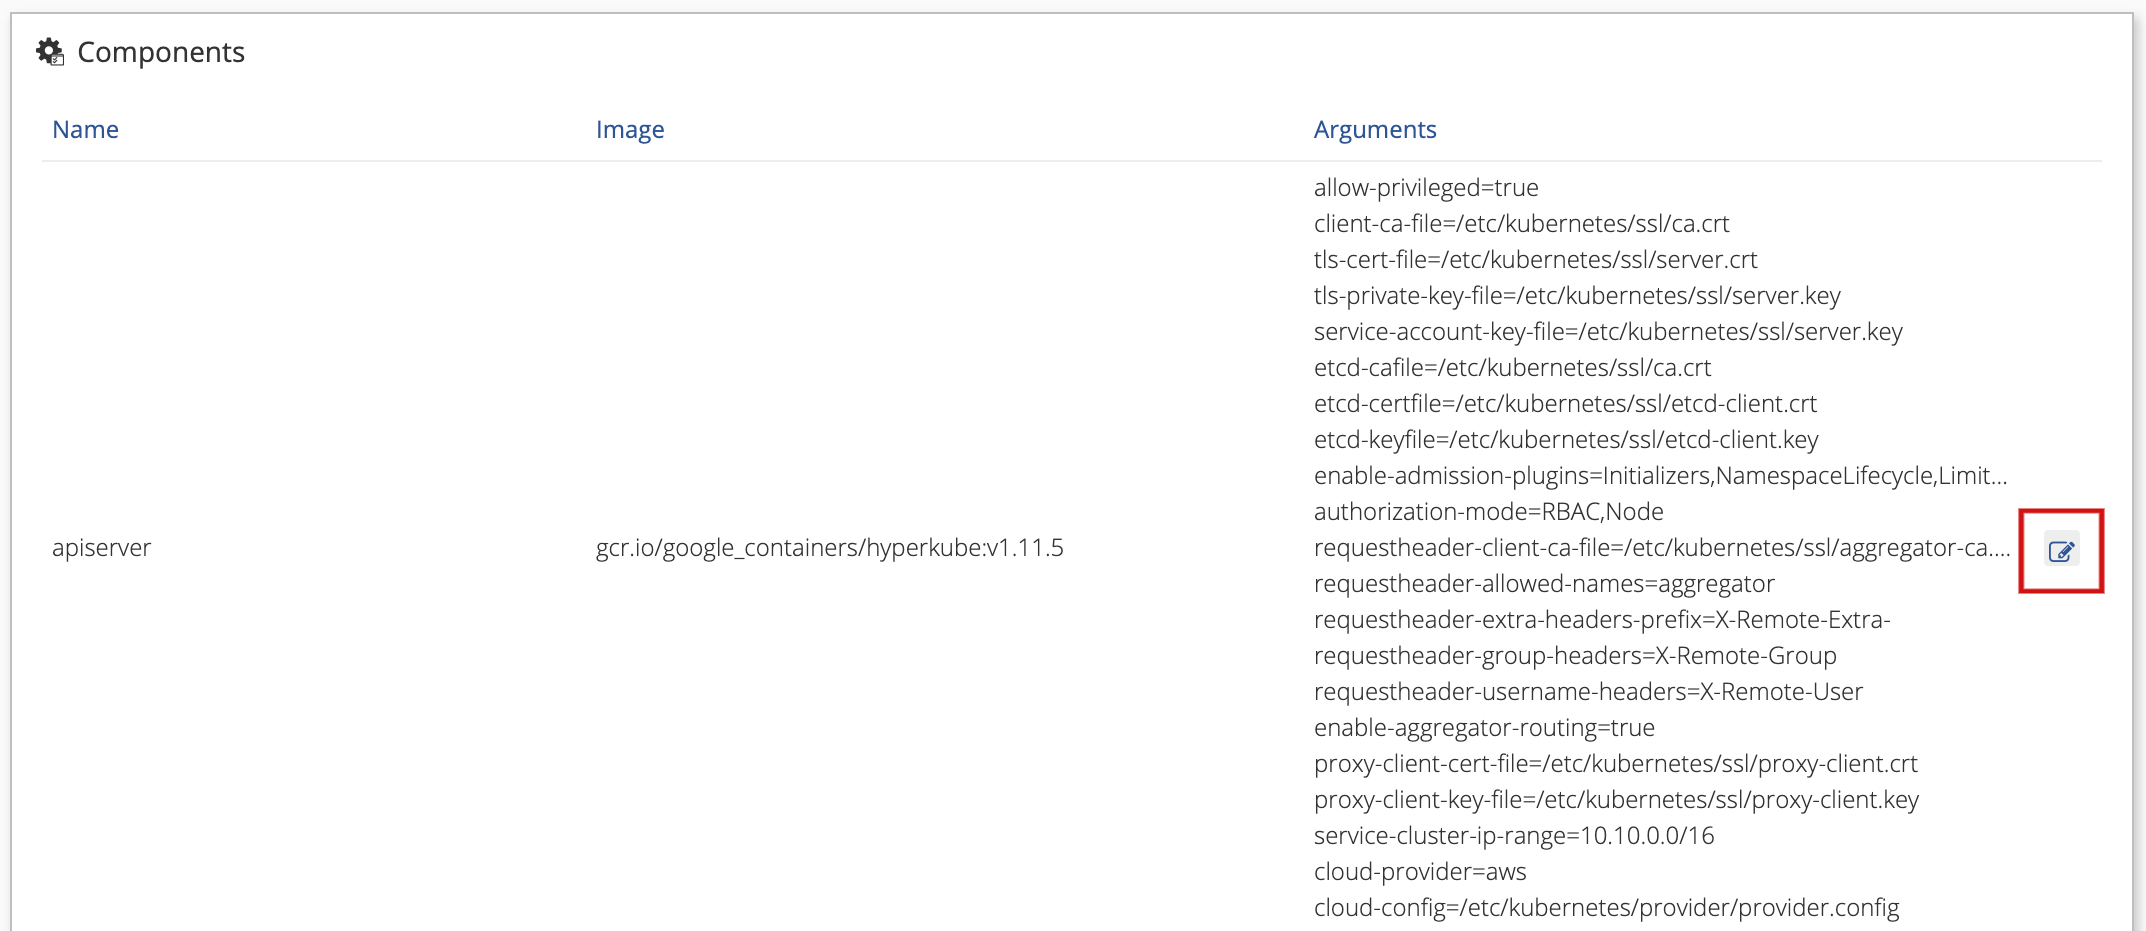
The Components section displays all default Application Components configured for a cluster type. You may add, edit, or delete arguments for cluster components.
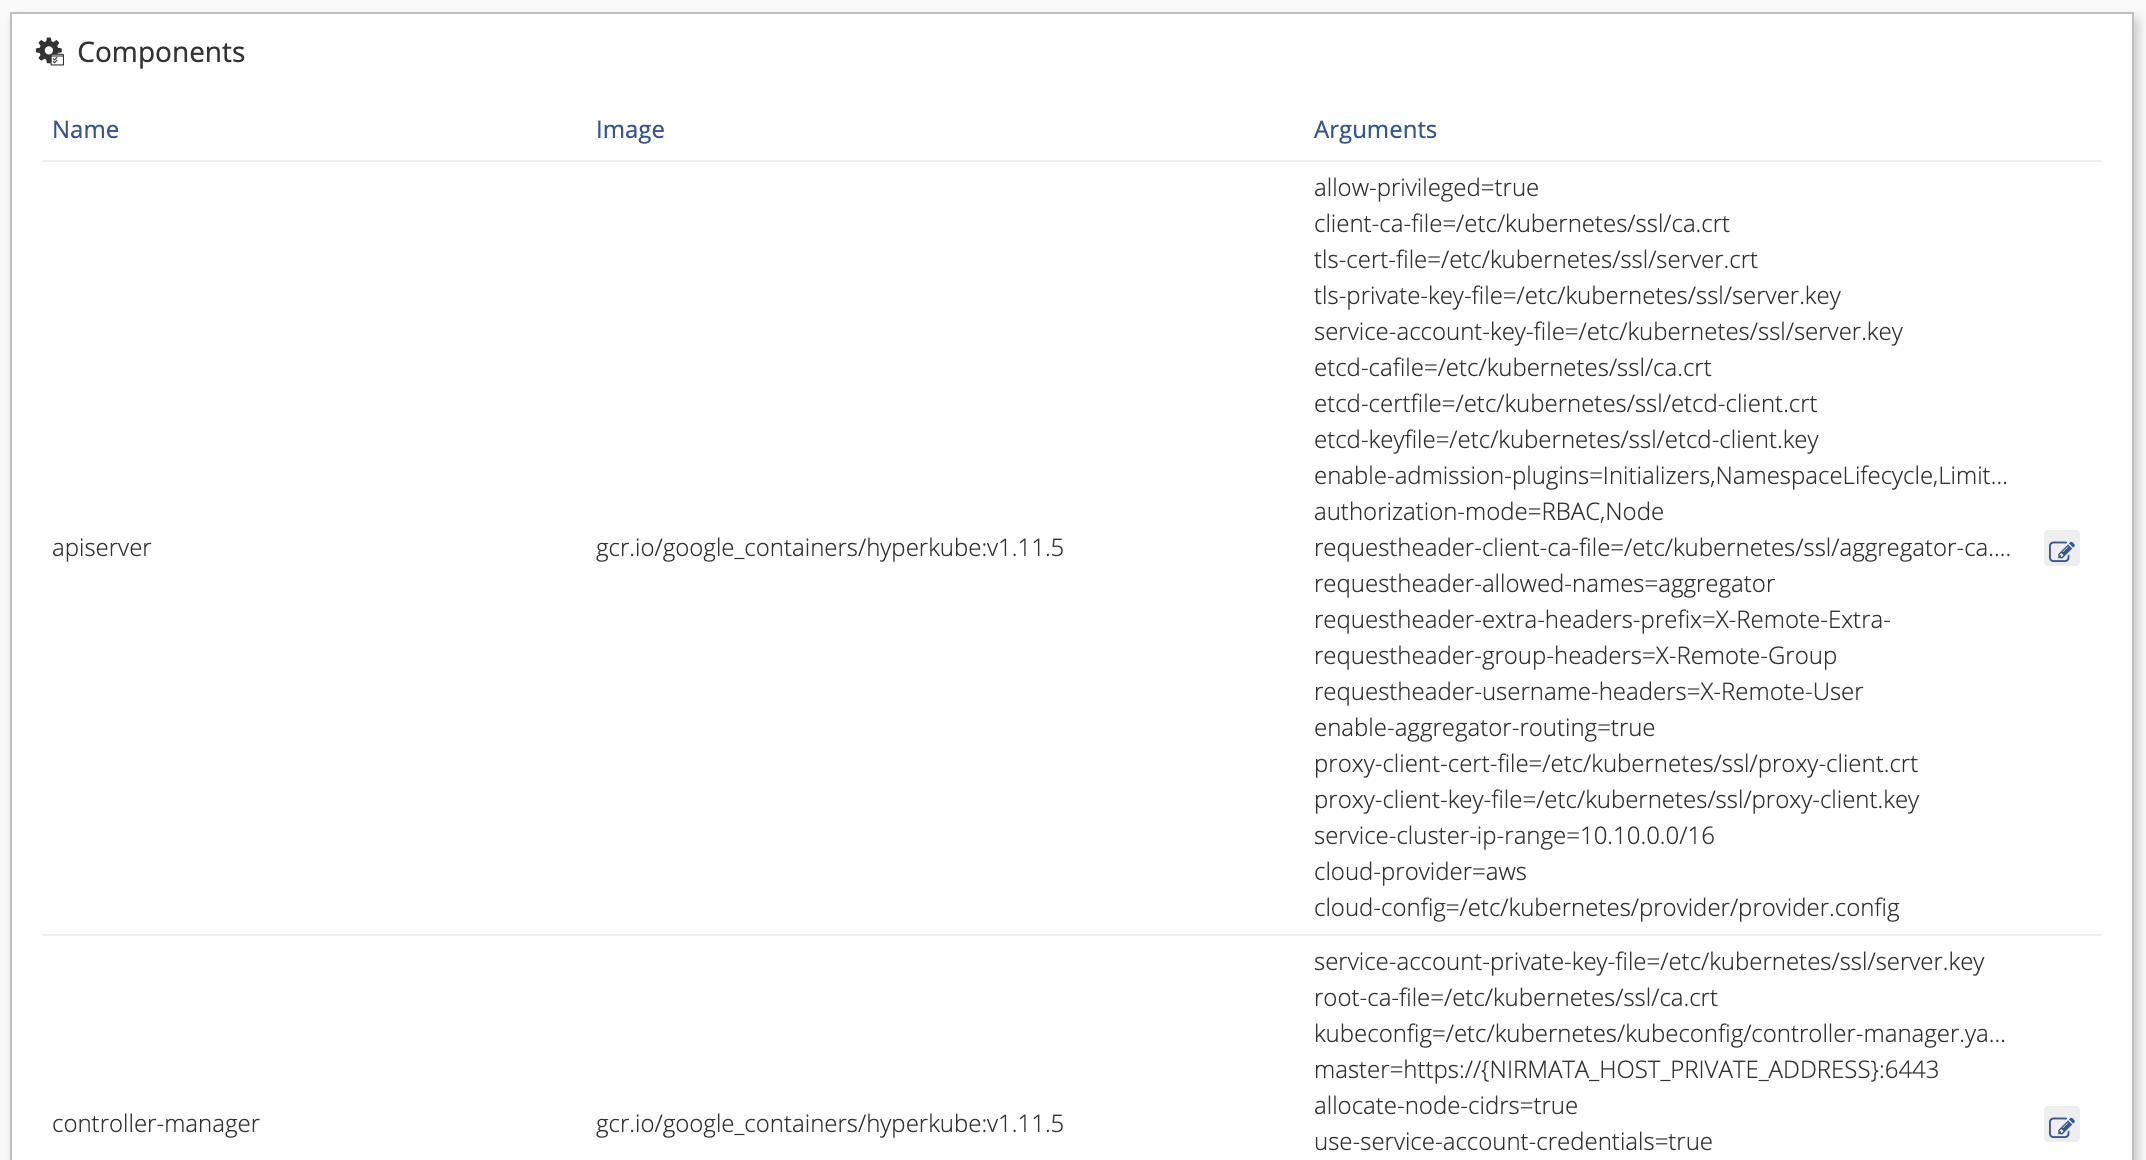
Each application component displayed includes the Name, Image, and Arguments for the component. You may edit a Component Specification to add, edit, or delete its Arguments.
Adding a Component Specification Argument
-
To add a component specification argument, click the Edit icon on the right side of the Component section. Be sure to click the icon next to the component you wish to change.
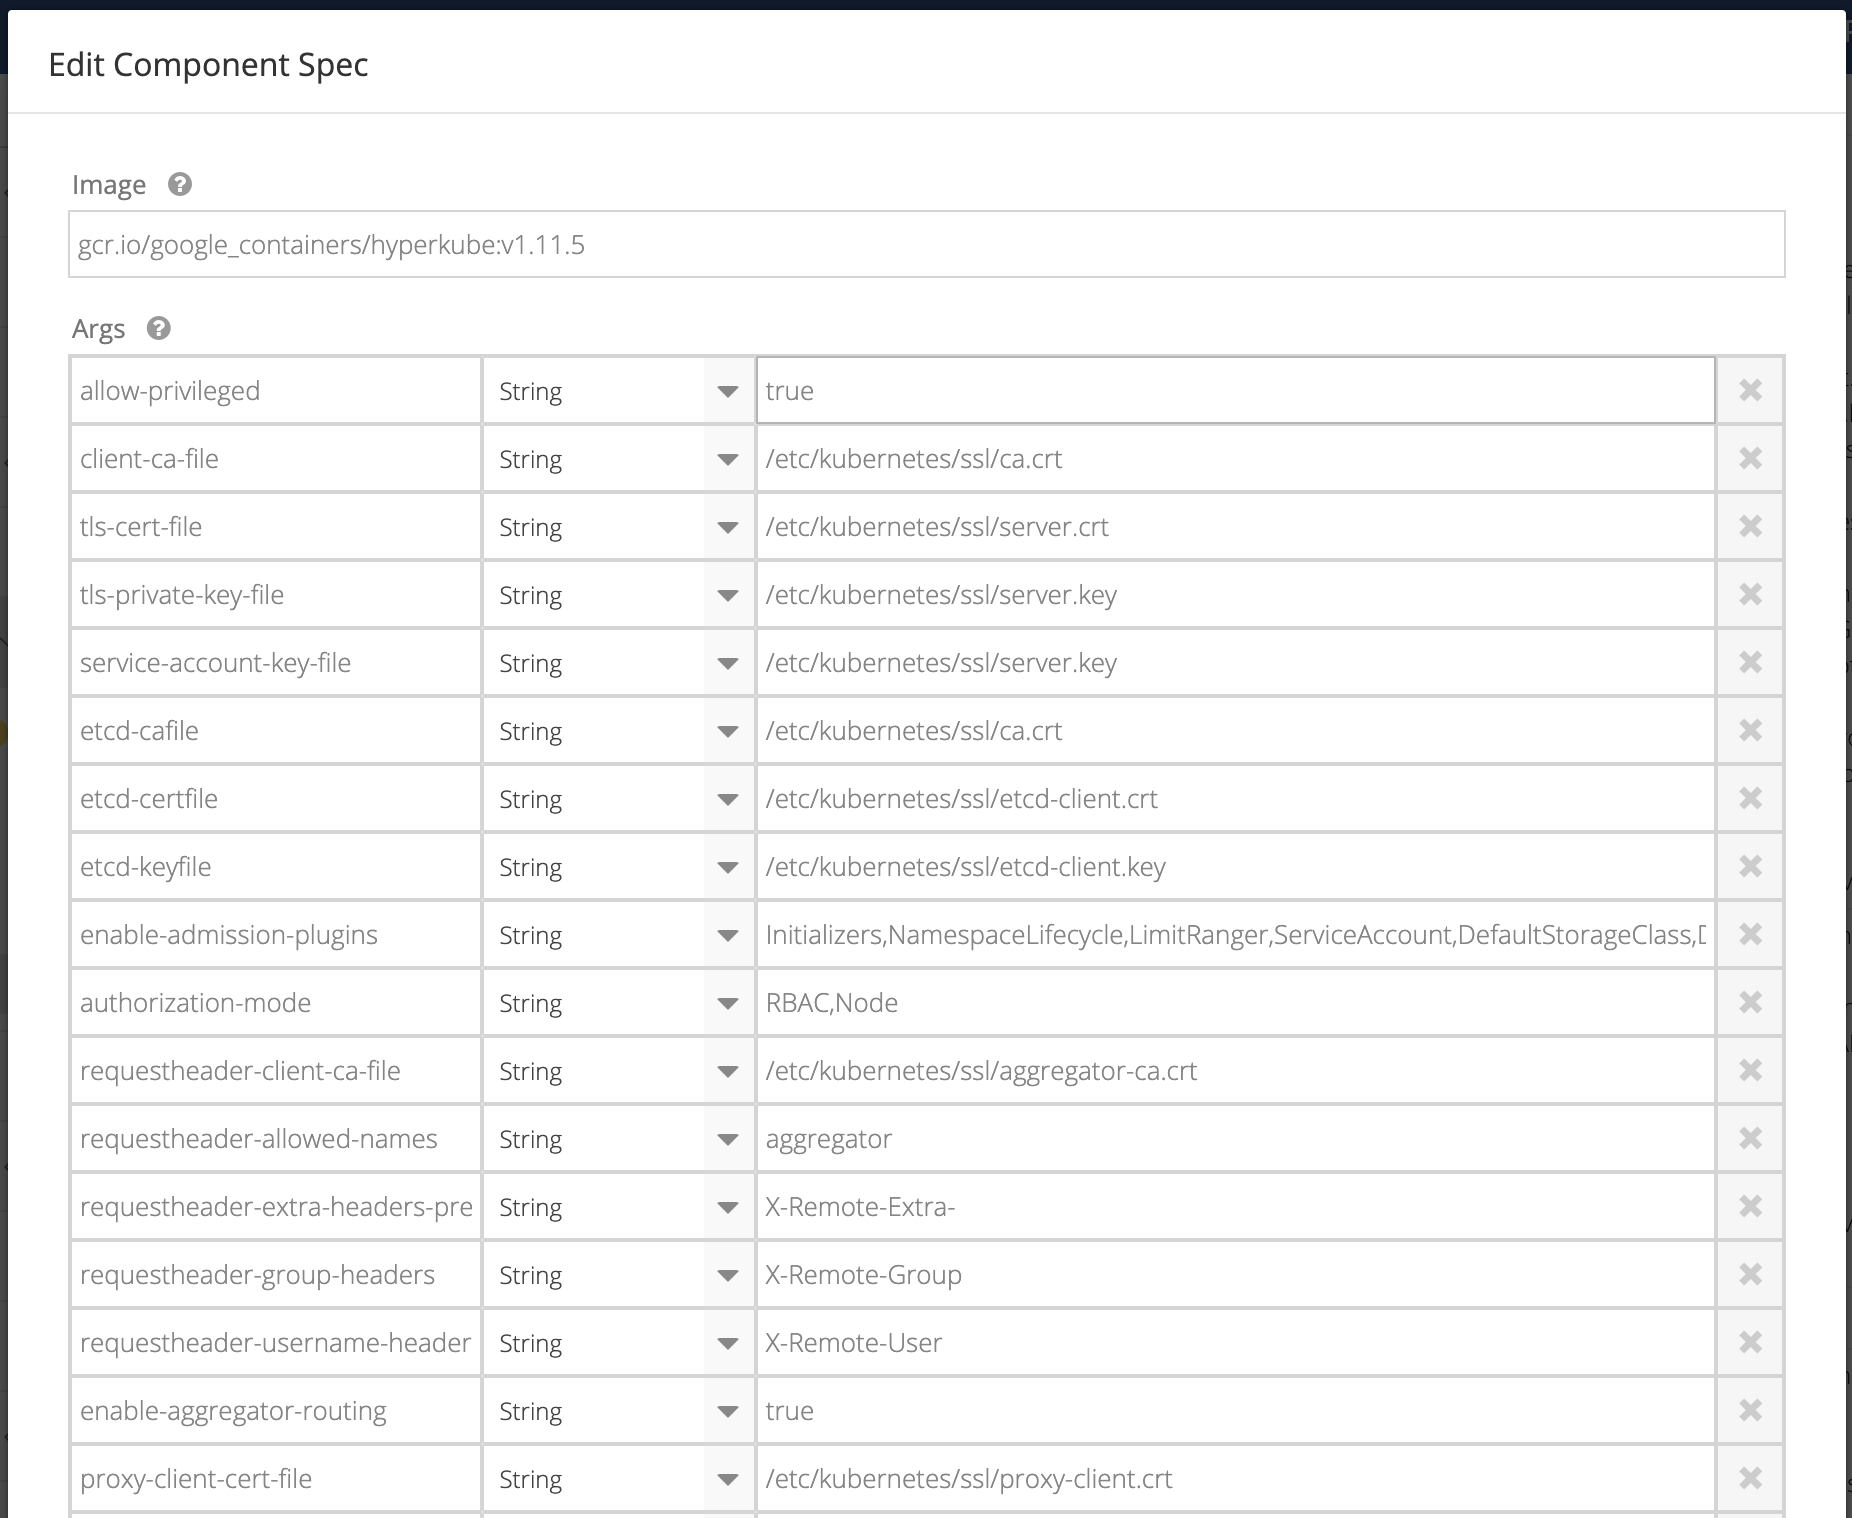
The Edit Component Spec overlay appears. There are two sections in this overlay: Image and Args.
The Image field specifies the component image used. Args is the list of key-value pairs (arguments) used by the component.
-
Click + Add Item at the bottom of the Args table.
-
Enter the Key name.
-
Select a Type from the drop-down list. Options are String, Number, and Object.

-
Enter the value for the new key-value pair.
-
Click the Save button to save the new key-value pair or click Cancel to return to the Type Details page.
Editing Component Specification Arguments
To edit a component specification argument, click the Edit icon on the right side of the Component section. Be sure to click the icon next to the component you wish to change.
-
Click inside the field containing the value you wish to modify.
-
Enter the new value for the key.
-
Click the Save button to save your changes, or click Cancel to return to the Type Details page without saving your changes.
Deleting Component Specification Arguments
To delete a component specification argument, click the Edit icon on the right side of the Component section. Be sure to click the icon next to the component you wish to change.
- Click the X on the right side of the argument you wish to delete.
- Click the Save button to save your changes, or click Cancel to return to the Type Details page without saving.

Controller Settings
The Controller Settings Panel allows you to enable or disable these cluster type settings:
- Is Insecure
- Use HTTP Proxy

Editing Controller Settings
-
To change Controller Settings, click the Edit icon on the right side of the Controller Settings section.
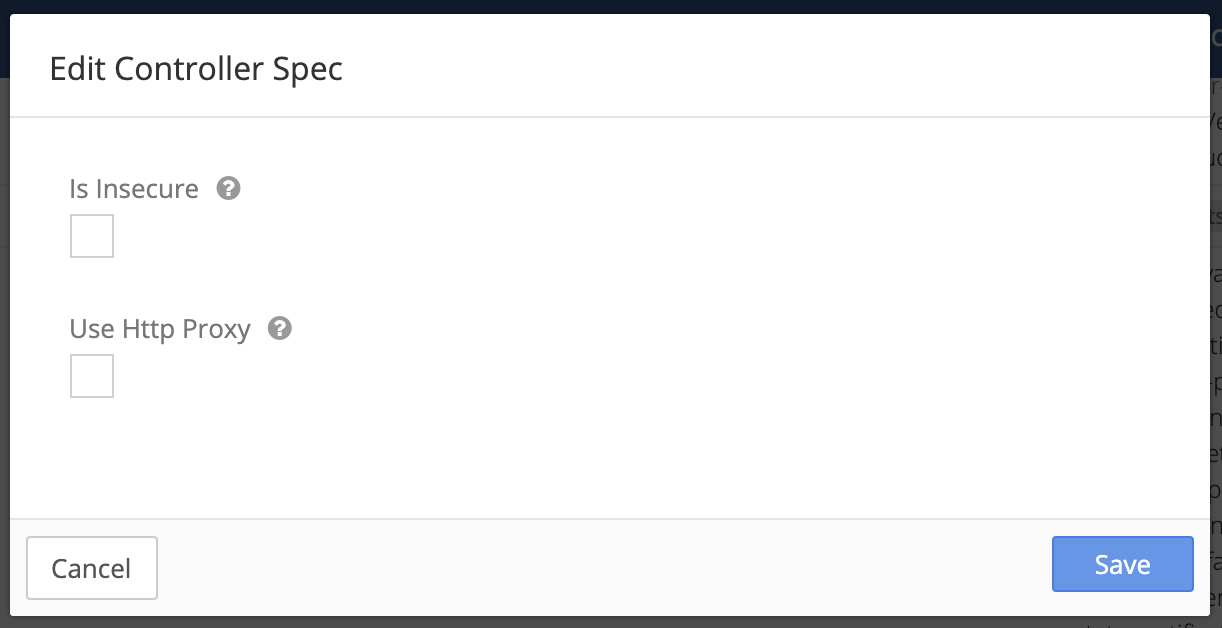
The Edit Controller Spec overlay appears.
-
To enable insecure HTTP connections, check the box next to Is Insecure.
-
To use an HTTP proxy, check the box next to Use Http Proxy.
-
Click the Save button, or click Cancel to return to the Type Details page without saving.
To disable either or both controller settings, uncheck the box and save the updated settings.
Note: you must enable the Is Insecure setting if you are using a self-signed SSL certificate for your application.
Network
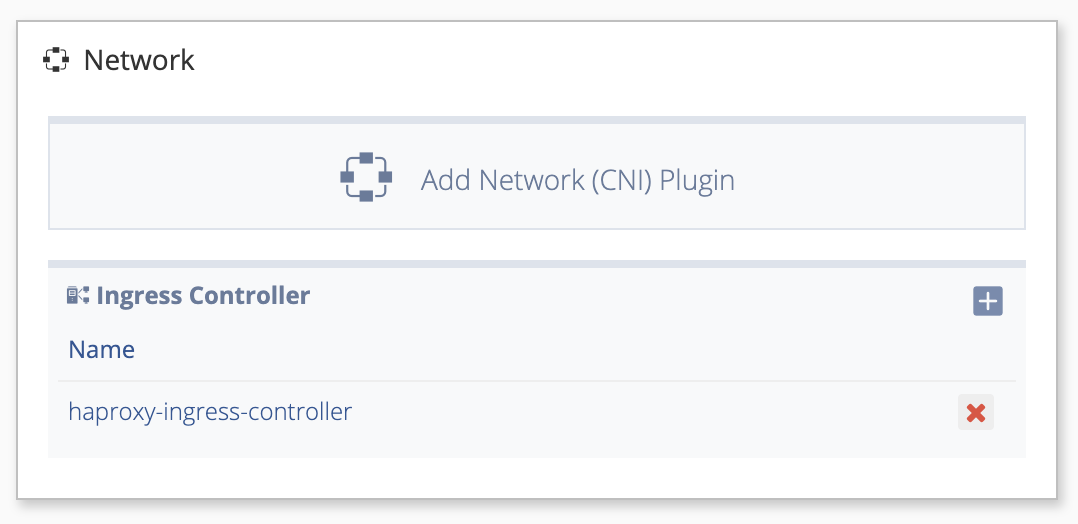
The Network panel allows you to manage ingress controllers and network plugins for the cluster. From the Type Details page, you may view, download, and add ingress controller specifications for a cluster type. The default Nirmata ingress controller is for HAProxy.
Note: you may only have one Ingress controller spec at a time for a cluster type. Uploading a new one replaces the existing default spec.
Viewing or Downloading an Existing Ingress Controller Specification
-
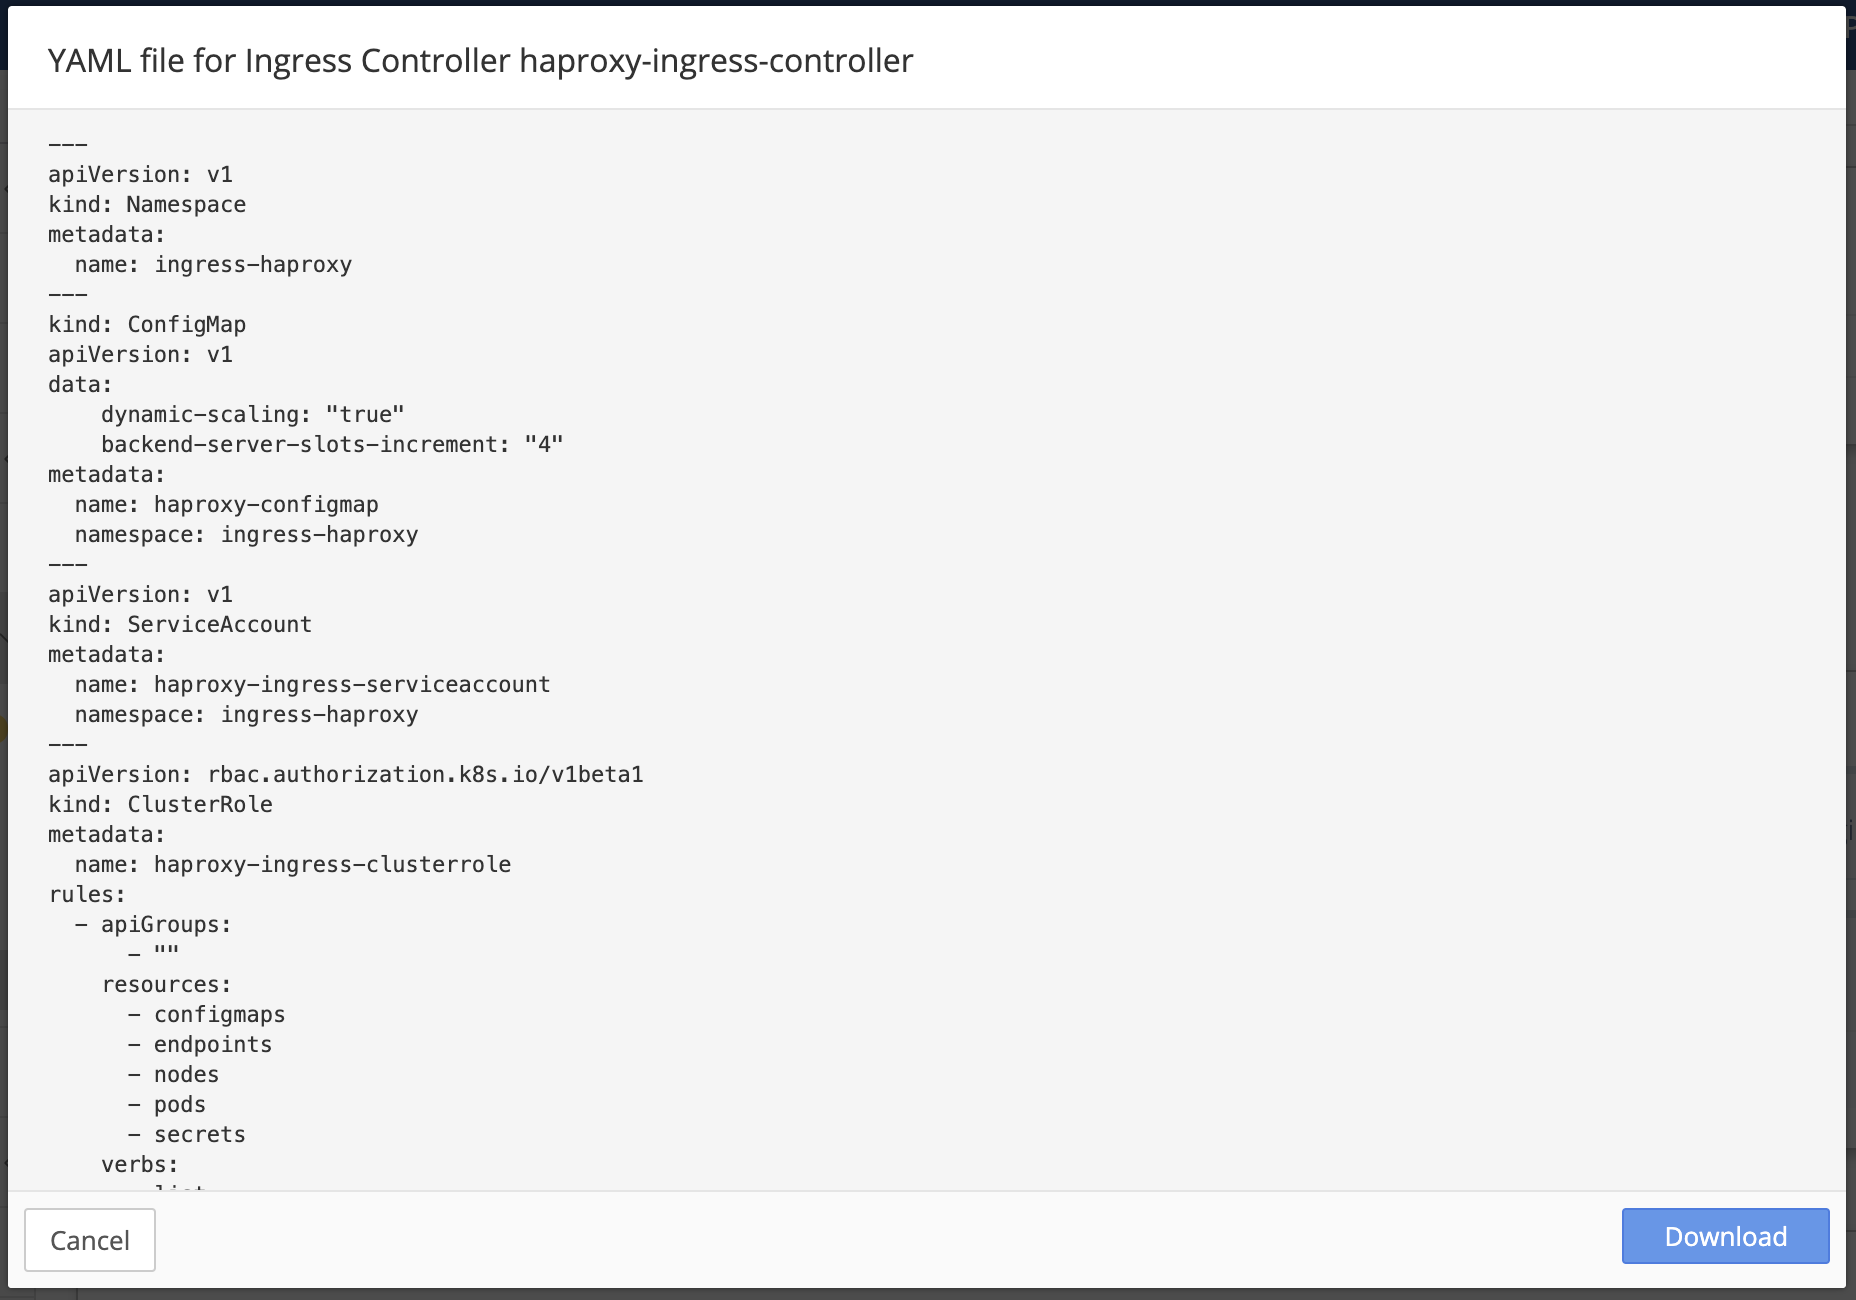
To view or download an existing ingress controller specification, click on the name of the specification in the Name column of the Ingress Controller section of the Network panel.
The YAML file viewer for the selected Ingress controller appears.
-
Scroll to view the entire file.
-
Click the Download button to download a zip file containing the YAML controller specification.
-
Click the Cancel button to close the overlay and return to the Type Details page.
You may use the downloaded YAML controller specification file as a template for creating a new one.
Adding Ingress Controller Specifications
- First, create a YAML controller specification file with the desired settings.
- Click the + button on the right in the Ingress Controller section of the Network panel.
The Add Ingress Controller Spec appears.
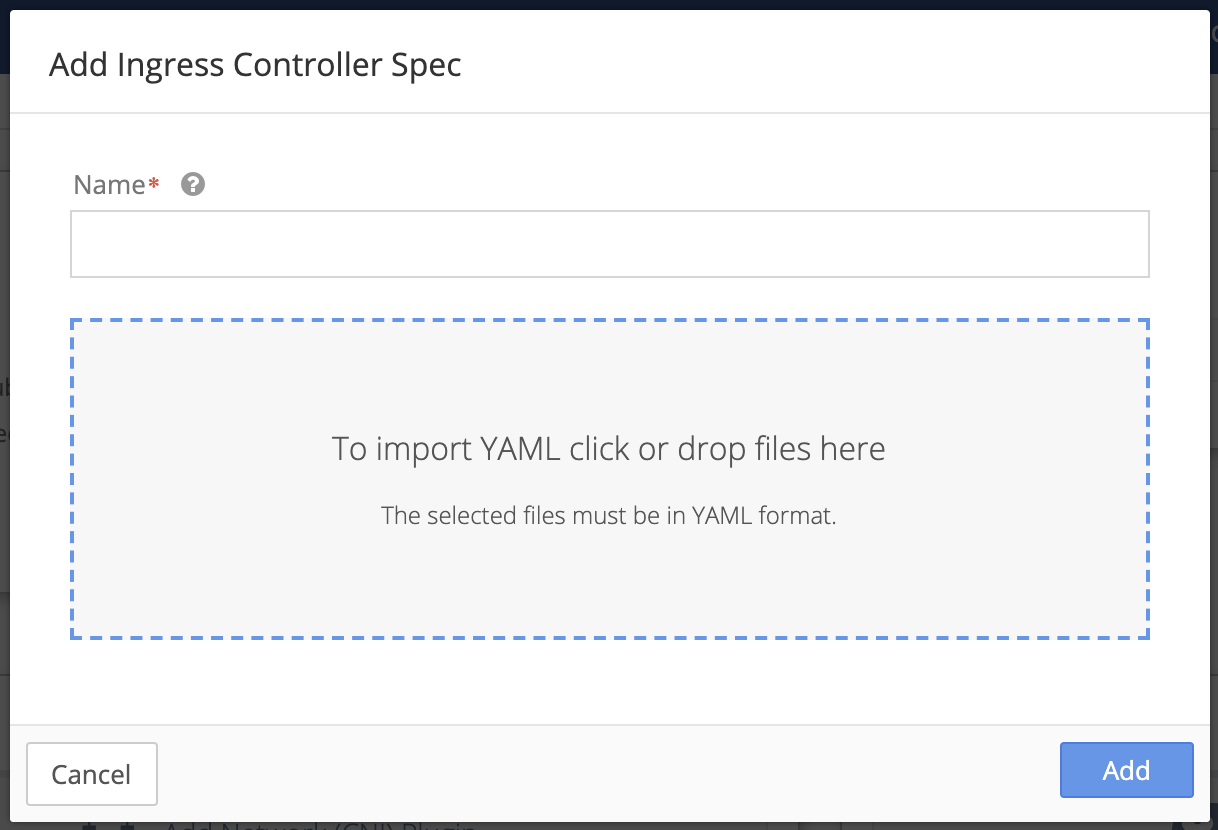
- Enter a Name for the new ingress controller spec.
- Upload your YAML controller specification file. Click inside the dotted line field to select and upload your file, or drag the file inside the dotted line field.
- Click the Add button to add the ingress controller spec, or click Cancel to return to the Type Details page.
Note: you may only have one ingress controller spec at a time for a cluster type. Uploading a new one replaces the existing default spec.
Deleting Ingress Controller Specifications
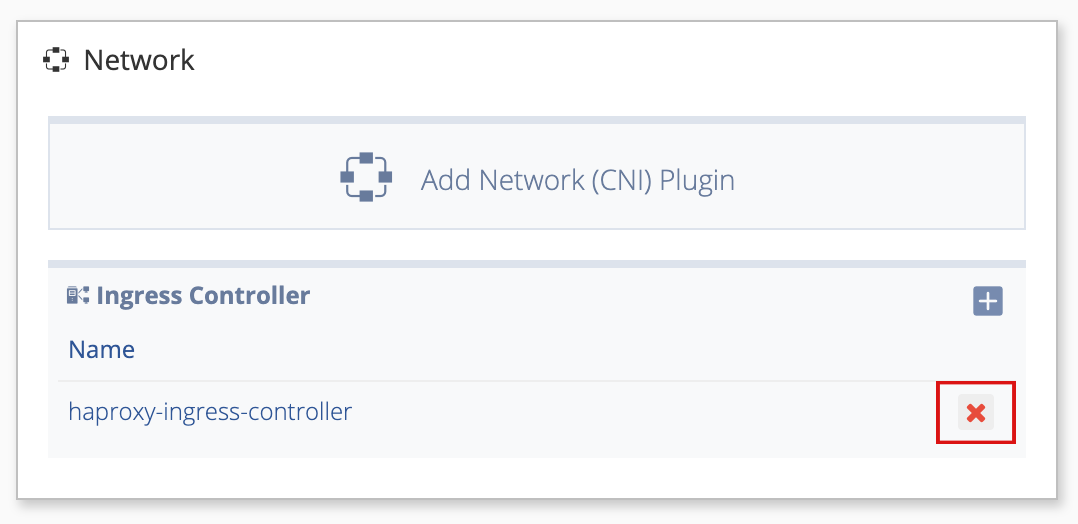
- Click the red X to the right of the Ingress controller specification.
Network Plugins
Nirmata packages Flannel by default, and uses the CNIs provided by cloud providers for Kubernetes networking. Customers wishing to use a different CNI can add the plugin YAML using the Network panel.
Adding Network Plugins
-
To add a network plugin, you must first get a plugin YAML file.
-
Click Add Network (CNI) Plugin in the Network panel.
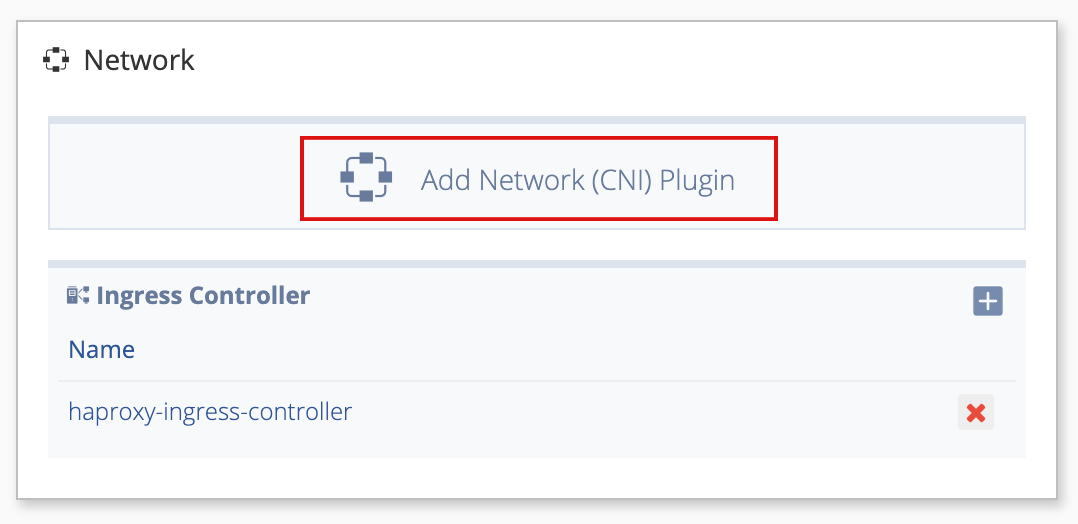
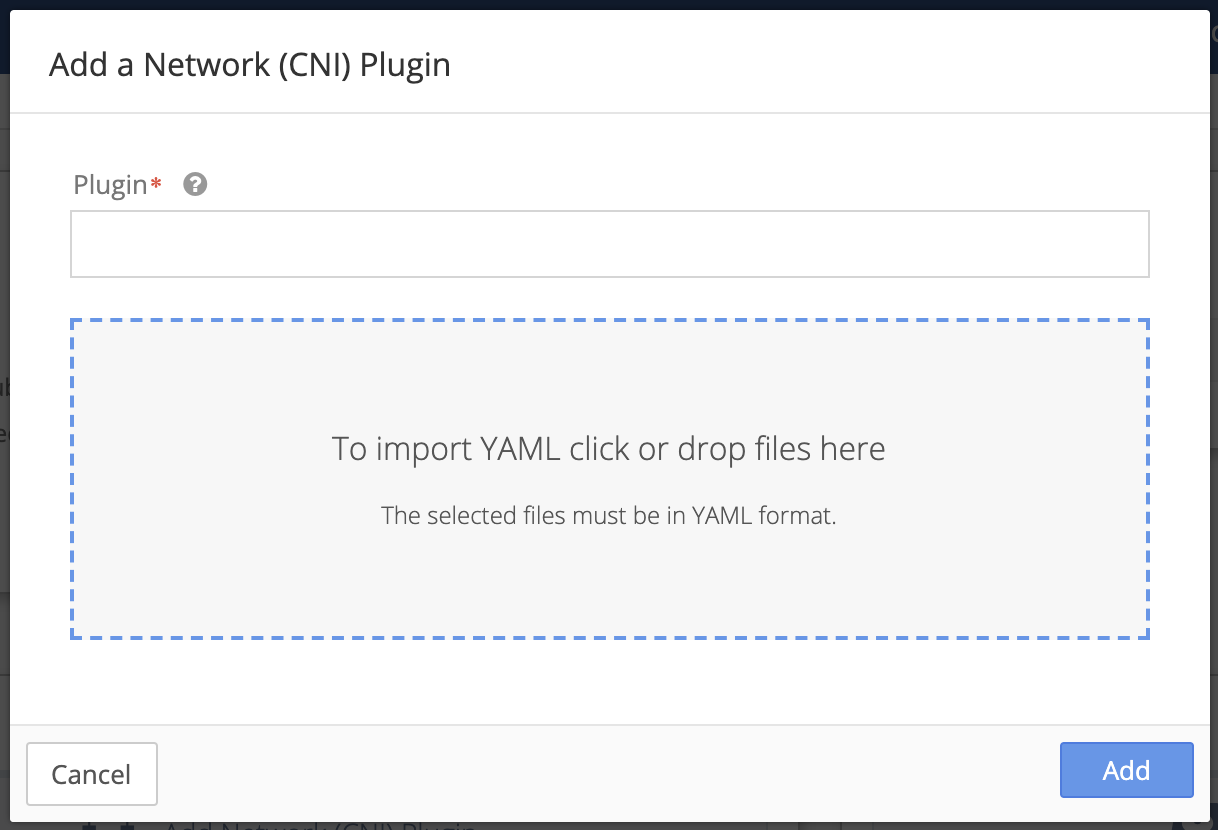
The Add a Network (CNI) Plugin overlay appears.
-
Enter a Name for the network plugin.
-
Upload your plugin YAML file. Click inside the dotted line field to select and upload your file, or drag the file inside the dotted line field.
-
Click the Add button to add the new network plugin spec or click Cancel to return to the Type Details page.
Proxy Settings
Proxy settings allow you to specify the IP addresses Kubernetes uses for proxies for your cluster type.

Adding Proxy Settings
-
To add proxy settings, click the edit icon on the upper right of the Proxy Settings section of Type Details.
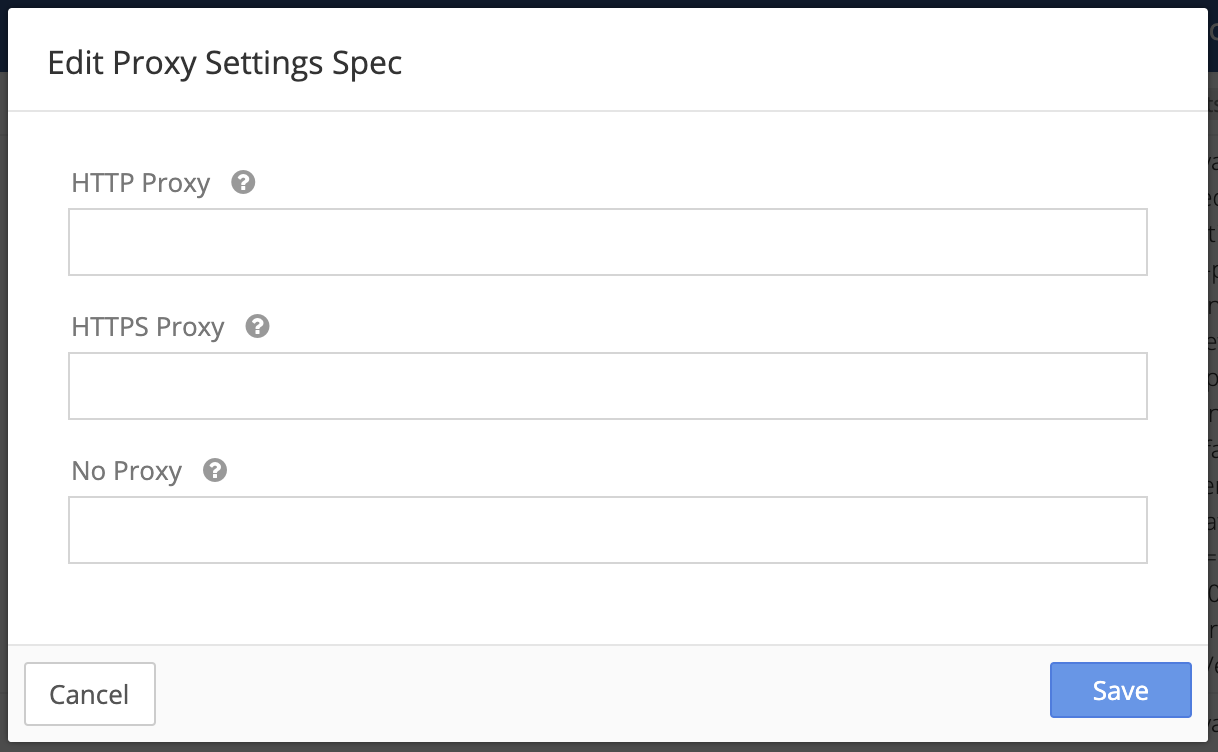
The Edit Proxy Settings Spec overlay appears.
-
Enter the IP address for an HTTP proxy in the HTTP Proxy field.
-
Enter the IP address for an HTTPS proxy in the HTTPS Proxy field.
-
Enter the IP address used when there is no proxy.
-
Click the Save button to save your changes or click Cancel to return to the Type Details page.
Editing Proxy Settings
- To edit proxy settings, click the edit icon on the upper right of the Proxy Settings section of Type Details.
- Change the IP address values.
- Click the Save button to save your changes or click Cancel to return to the Type Details page.
Deleting Proxy Settings
- To delete proxy settings, click the edit icon on the upper right of the Proxy Settings section of Type Details.
- Delete the IP address values.
- Click the Save button to save your changes or click Cancel to return to the Type Details Page.
Storage
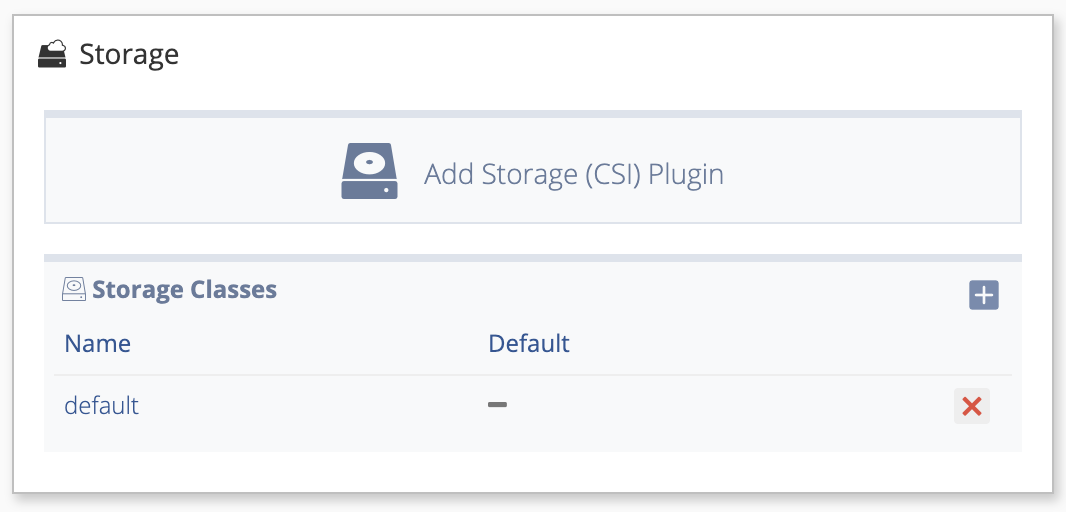
You can add, view, download, or delete storage class plugins from your cluster type. By default, Nirmata picks a storage class based on infrastructure type. For public clouds, it uses default block storage class available for respective public clouds.
Viewing and Downloading Storage Class Plugin
-
To view and download the storage plugin YAML file click on the name of the storage class in the Name column of the Storage panel.
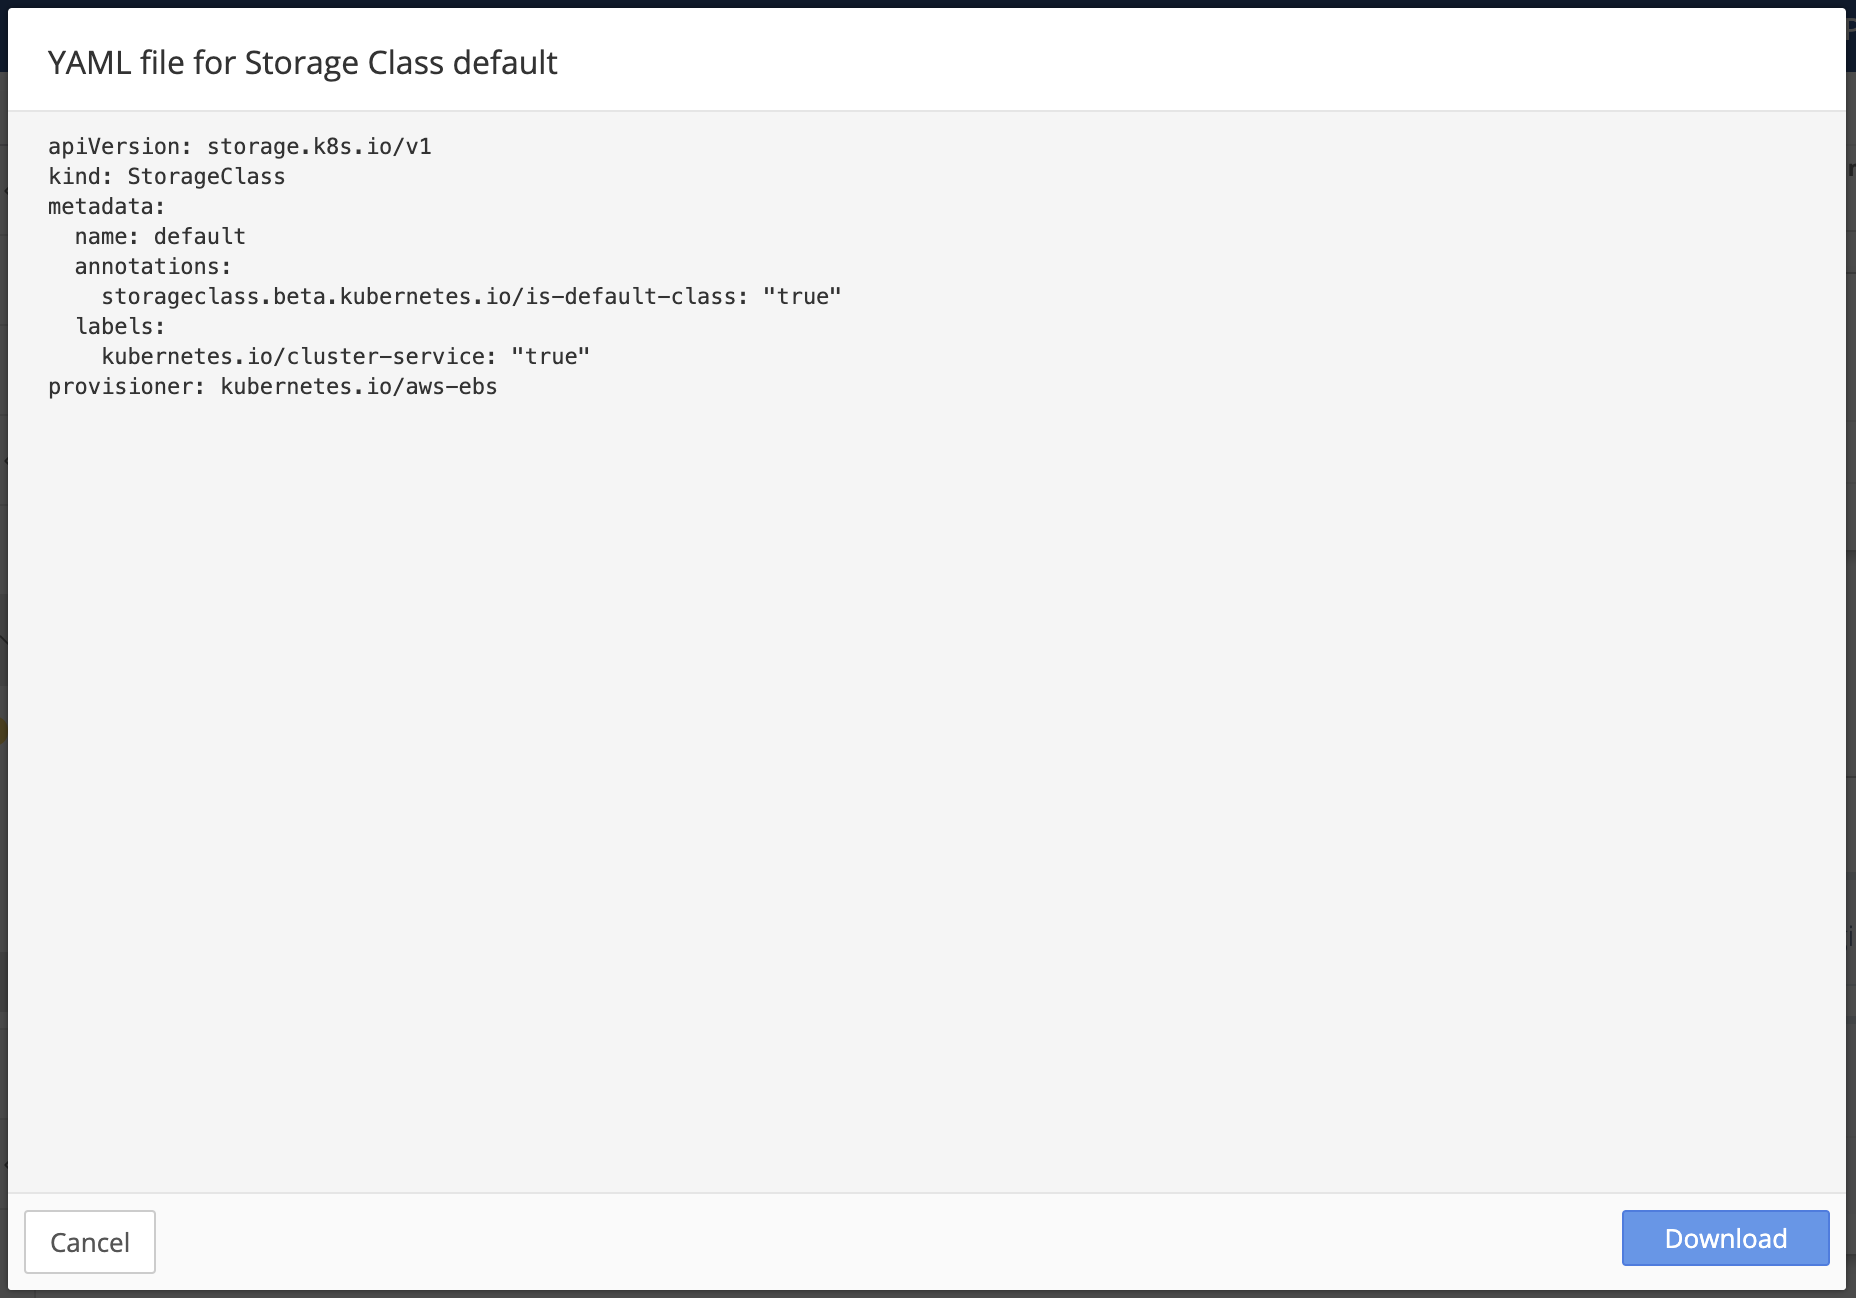
The YAML file viewer for the selected storage class appears.
-
Click the Download button to download a zipped copy of the YAML file or click Cancel to return to Type Details.
You may use the downloaded YAML storage class plugin file as a template for creating a new plugin YAML file.
Adding a Storage Class Plugin
-
To add a storage class plugin, you must supply a plugin YAML file.
-
Click Add Storage (CSI) Plugin in the Storage panel.
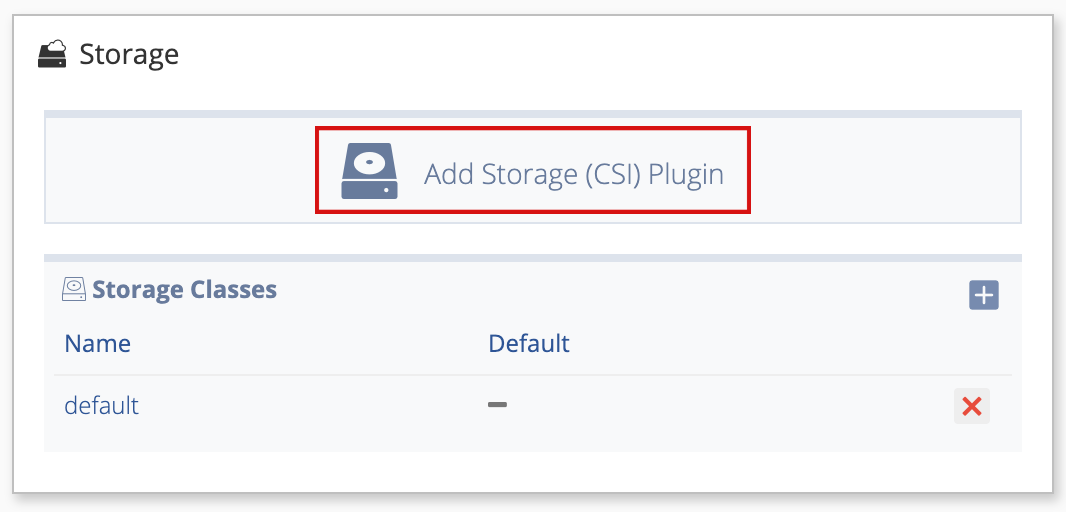
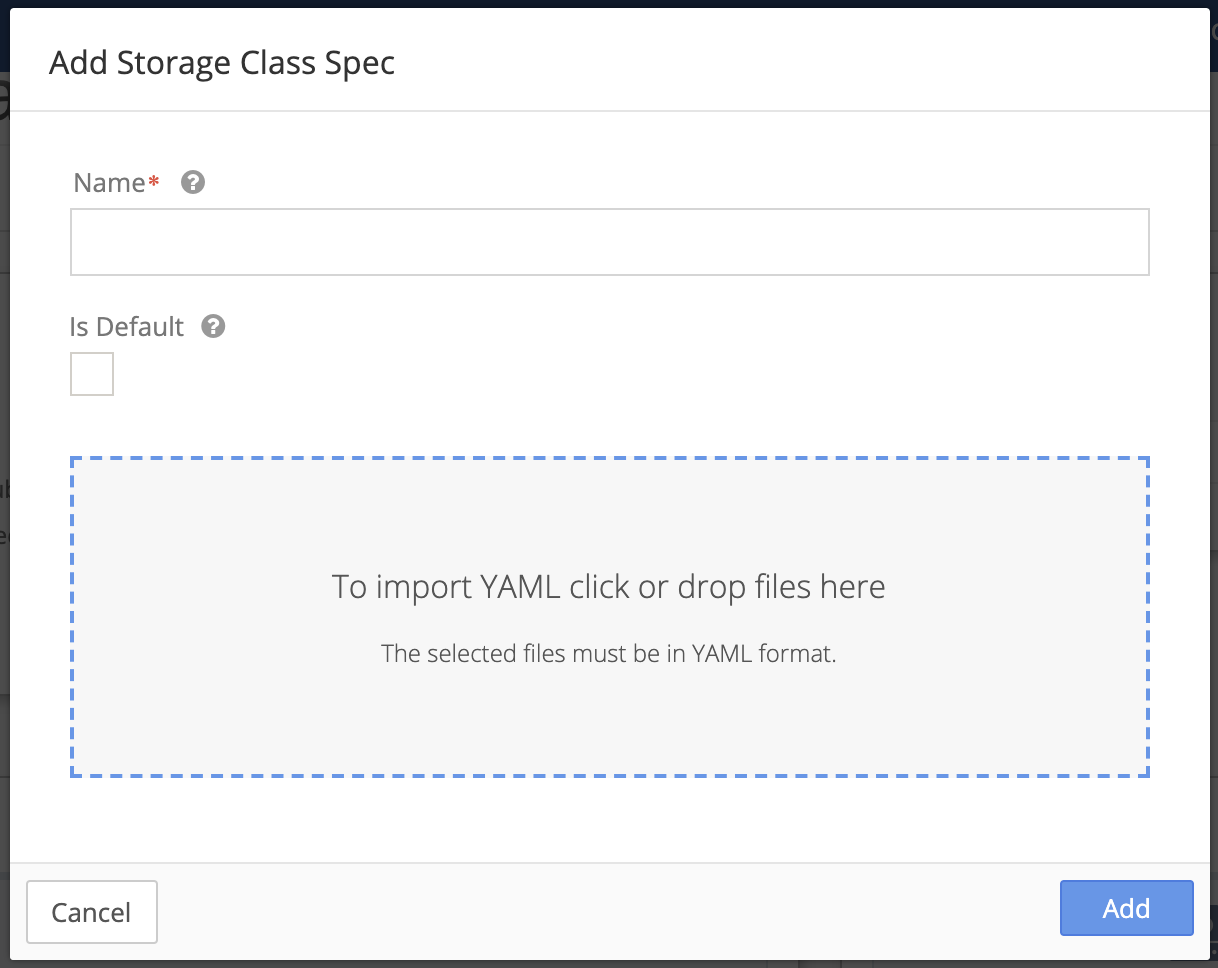
The Add Storage Class Spec overlay appears.
-
Enter a Name for the storage plugin spec.
-
Upload your plugin YAML file. Click inside the dotted line field to select and upload your file, or drag the file inside the dotted line field.
-
Click the Add button to add the new storage class plugin spec or click Cancel to return to Type Details.
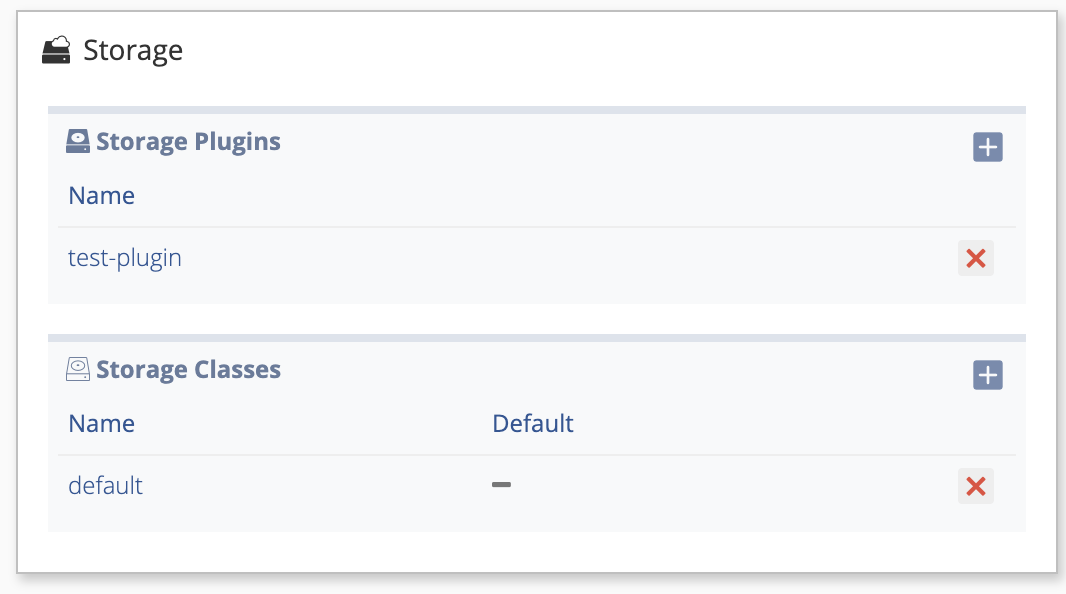
The newly added storage class plugin appears in the Storage Plugins section of the Storage panel.
Deleting a Storage Class Plugin
-
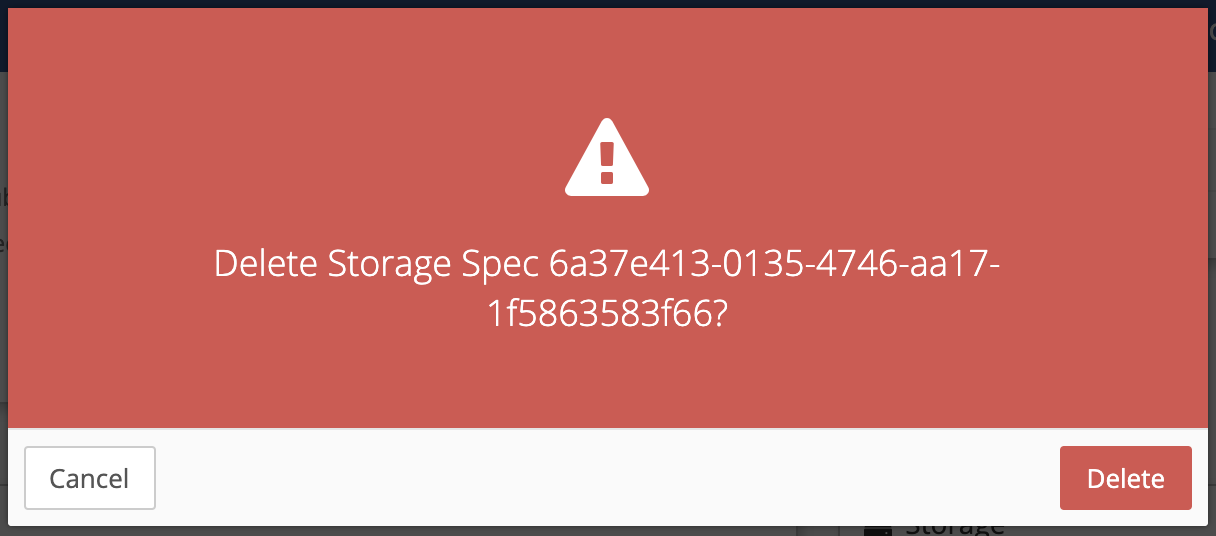
Click the red X to the right of the storage class plugin spec you wish to remove.
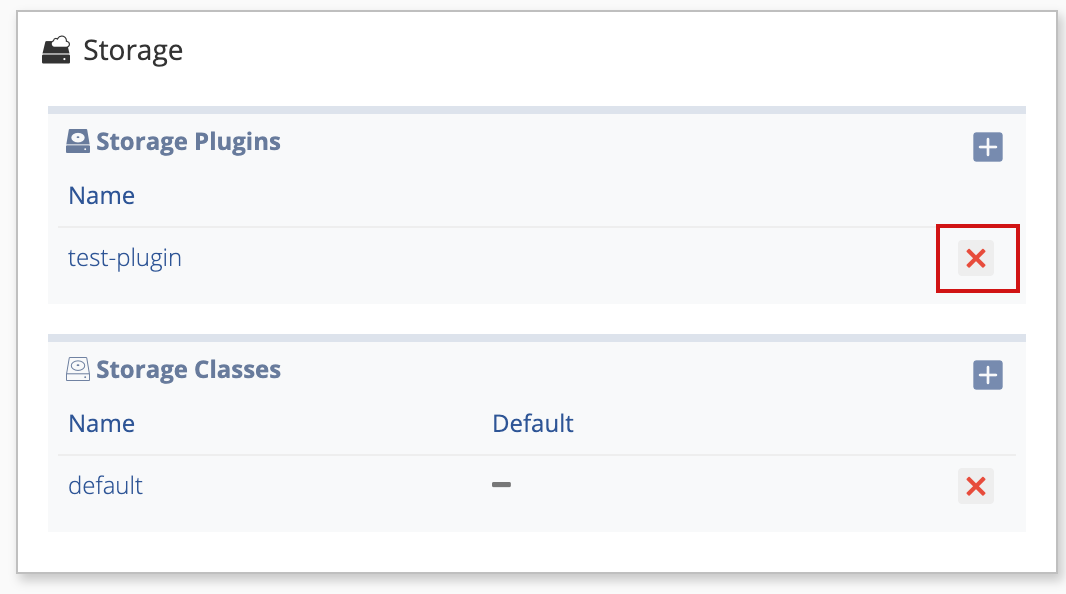
A confirmation Overlay appears.
-
Click the Delete button to delete the storage class plugin spec, or click Cancel to return to Type Details.